Intro to databases
Databases help you structure information in Notion in a variety of ways — letting you organize, categorize, label, filter, search, view, and utilize it to get jobs done. Below is a walkthrough of how Notion databases work and how to build your own 🏗
Database basicsCreate a databaseFull page vs. in-line databasesFull page databasesIn-line databasesPropertiesBasic properties 👌 Advanced properties 💪 Managing propertiesEdit property valuesHide & show propertiesFilterAdd a filterAdd a filter groupSortViewsTable viewBoard viewList viewCalendar viewGallery viewTimeline view Create a viewEdit viewsFiltered & sorted viewsNavigating viewsOpen & edit database pagesCustomize database pages Menus & optionsDatabase descriptionsDatabase templatesLinked databasesFAQsRelated guides
Database basics
There are three things that distinguish Notion databases from spreadsheets and databases you can build with other software:
- Customizable properties Add properties to contextualize, label and augment any database item with more information, like dates, people, text, links, etc. More on properties here →

- Multiple views you can toggle between Your data isn't stuck in a table. View the exact same database as a board, list, calendar, gallery, and timeline — whatever makes the information most useful. More on views here →
- Every item is its own editable page This one is unique to Notion. Every item you enter into your database can be opened as its own Notion page, where you can layer in any information you want. More on this here →
Create a database
There are several ways to create a database inside Notion:
- Create a new page in your workspace, then choose what type of database you want from the grayscale menu on that empty page.
- Create a database page inside an existing page by typing followed by the type of database you want (i.e. table, board, etc.). Choose the full-page version.
- Create a database in-line on your page by typing followed by the type of database you want. Choose the in-line version.
Full page vs. in-line databases
All databases in Notion can exist in two formats — as a full-page, or in-line on another page that contains unstructured data too (like a table in the middle of a written document).
Full page databases
- Create a full-page database by creating a new page in your workspace and selecting a database type from the grayscale menu.
- Or type followed by the type of database you want (board, list, etc.) and the word .
- Full page databases appear just like any other page in your sidebar.
- You can lock a full-page database so that other people can't change properties and value options by going to the icon and switching on .
- To turn a full page database into an inline database, you can just drag the database into another page in the sidebar, which will turn it into a subpage.
- Then navigate into the page, and click the icon, and select in the drop down menu to turn it into an inline database.
In-line databases
In-line databases can live alongside all other types of content. One popular use case is adding them into documents.
- Create an in-line database by typing followed by the type of database you want and the word .
- Controls/menus for your database are hidden until you hover over it.
- You can expand an in-line database to full-page by hitting at the top right.
- You can turn an in-line database into a full-page database by grabbing the and dragging into the sidebar as a top-level page.
- The , and menus are all tucked within the icon at the top right of your database.

- You can , , move or copy the link to your in-line table by clicking the icon that appears on hover in the left margin.
- Your in-line database will appear as a sub-page of the page it's on in your sidebar.
Properties
Add properties to your database items to give them all kinds of context — due dates, task owners, relevant URLs, last edited timestamps, etc. Then use these properties to filter, sort, and search your data. Here are all the properties you can add to a database and what they do:
Basic properties 👌
- Name: Whatever you're calling your item, i.e. the title of the page in your database.
- Text: Basic text for notes, descriptions and comments about database items.
- Number: Numerical formats like currencies and percentages. Useful for price, etc.
- Select: Dropdown menu of tags that can be selected one at a time. I.e. status or priority.
- Multi-Select: Dropdown menu of tags letting you add more than one at a time.
- Date: Accepts a date or a date range, allowing you to timestamp and set reminders.
- Person: Lets you mention other users in your workspace (or assign them to things).
- Files & Media: Allows you to upload files relevant to your database item.
- Checkbox: Simple checkboxes that indicate whether something is done or not.
- URL: Accepts a link to a website relevant to your database item.
- Email: Accepts email addresses and launches your mail client when clicked.
- Phone: Accepts a phone number and prompts your phone or computer to call it when clicked.
Advanced properties 💪
- Formula: Lets you perform calculations or trigger actions based on other properties. Full guide to formulas here →
- Relation: Lets you add items from another database as a property. More on that here →
- Rollup: Runs calculations based on properties in a related database. More here →
- Created Time: Timestamps an item's creation.
- Created By: Automatically records the user who created the item.
- Last Edited Time: Timestamps an item's last edit.
- Last Edited By: Records the user who edited the item last.
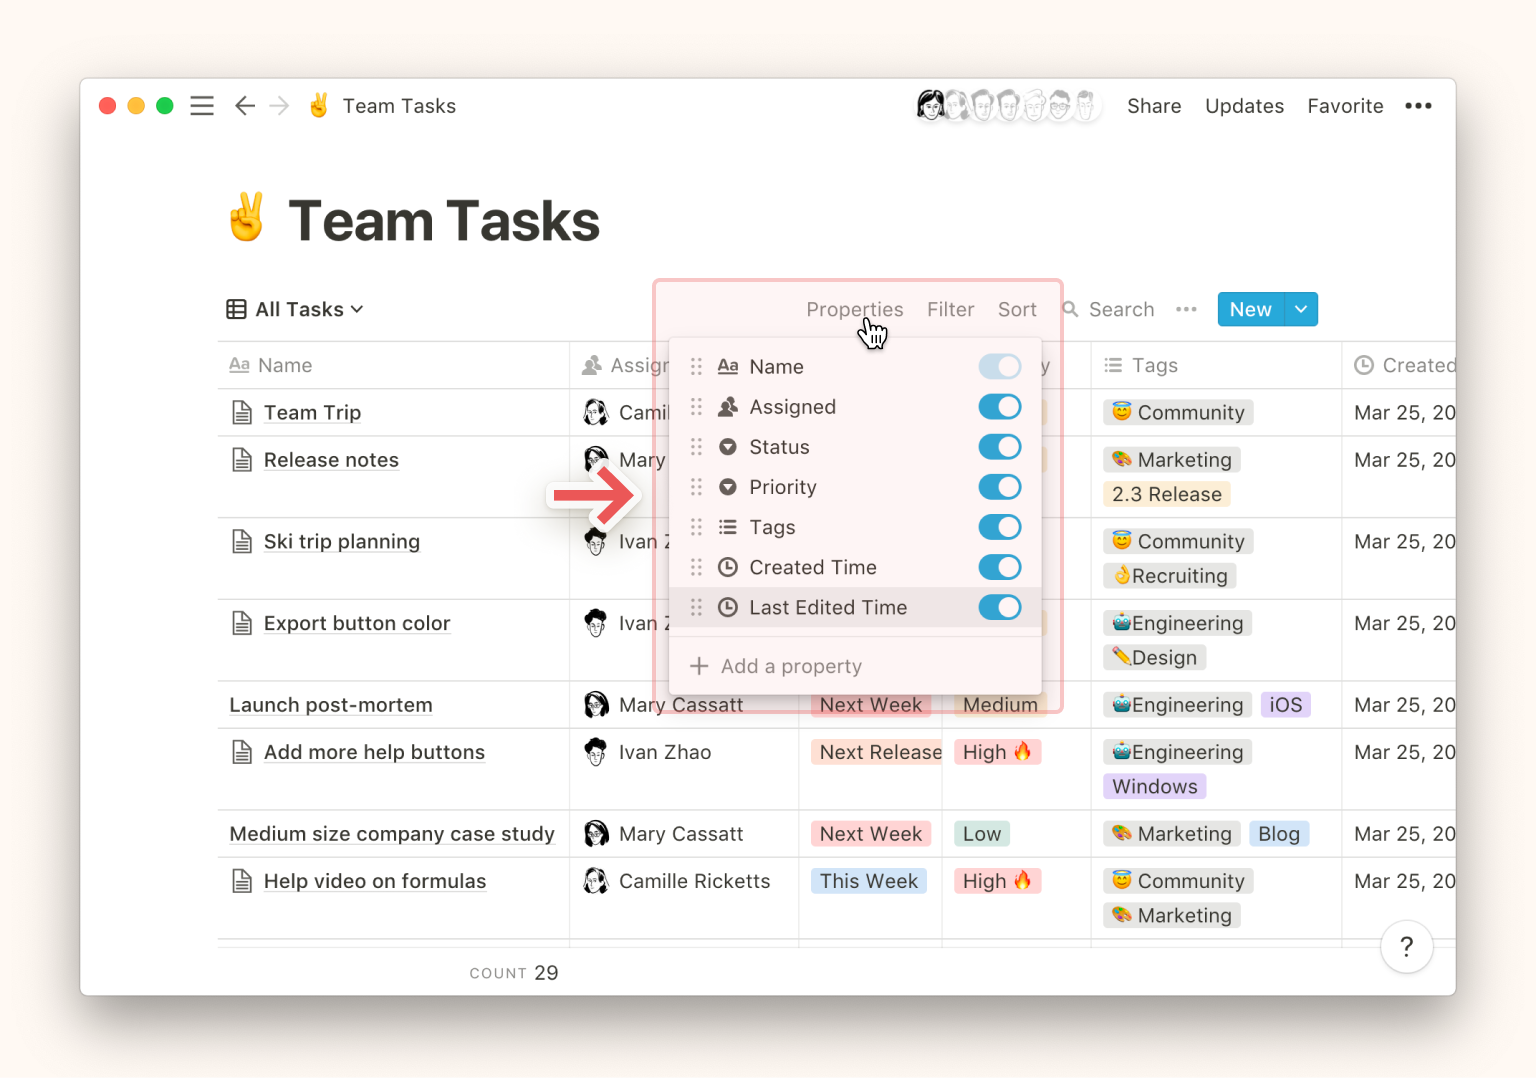
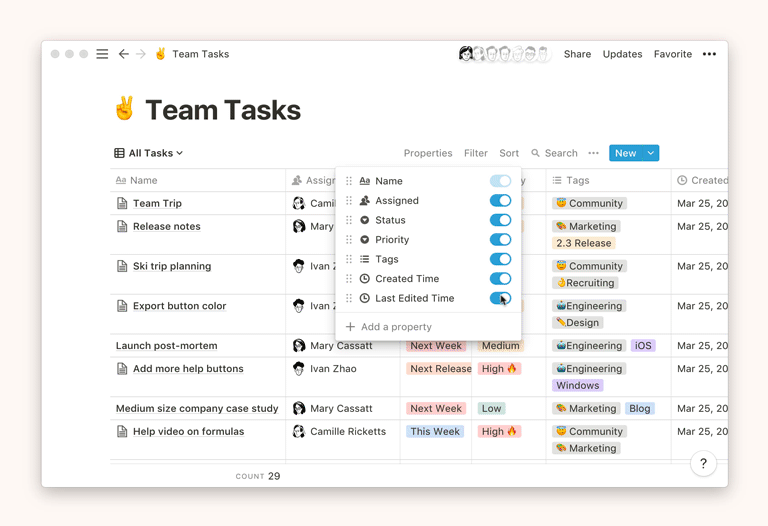
Managing properties
Every database has a menu toward the top right. (In in-line databases, this menu is tucked inside the icon at the top right). It gives you these options:
- Add a new property: Click .
- This will bring up a menu where you can name your property and select what type to use.
- , , or a property: Click the icon to the left of any existing property (or right click on it) to bring up these options.
- Hide or show a property: Turn the toggle switches off or on to either hide or display existing properties in your database.
- Rearrange properties: Change the order in which your properties display in your database by using the icon to drag them up or down.
Edit property values
Any data put into a property is called a value. The way you edit values is different for each type of property. Here are just a few examples:
- For and properties, you'll be prompted to add tags by typing what you want and pressing enter after each. Colors are randomly assigned.
- You can add as many unique tags to these menus as you want.
- Edit tag names and colors, or delete them by clicking on the property field (i.e. the table cell), then on the icon that appears to the right when you hover over any property.
- Reorder tags by grabbing the icon to their left and dragging.
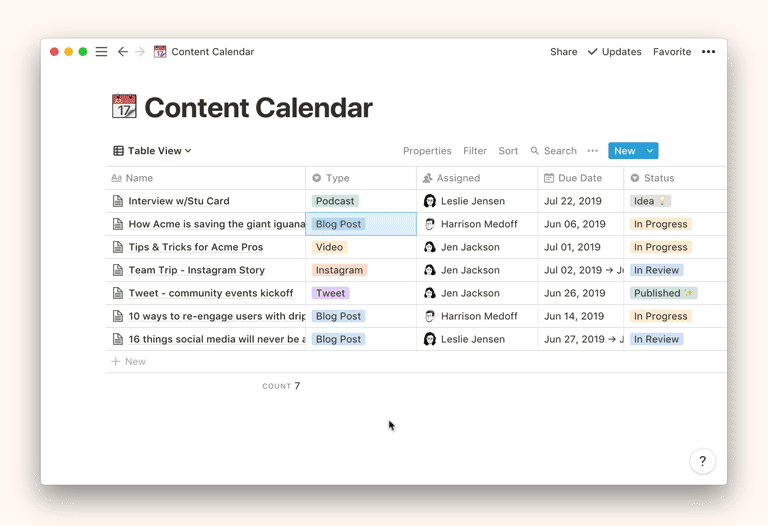
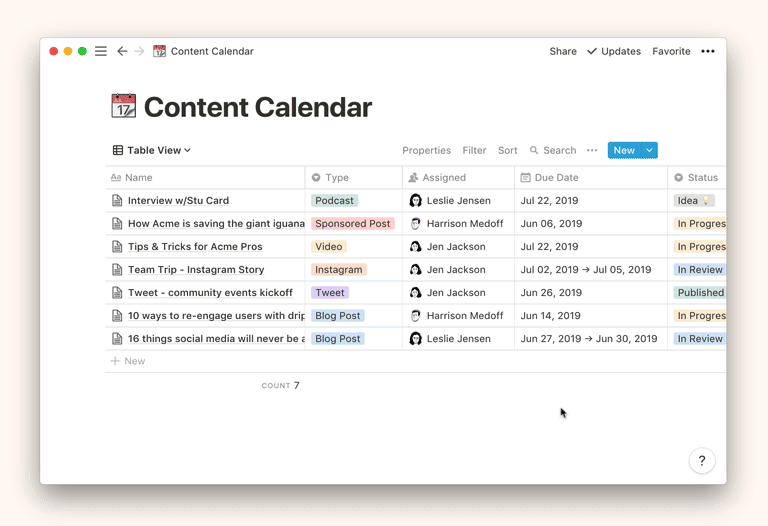
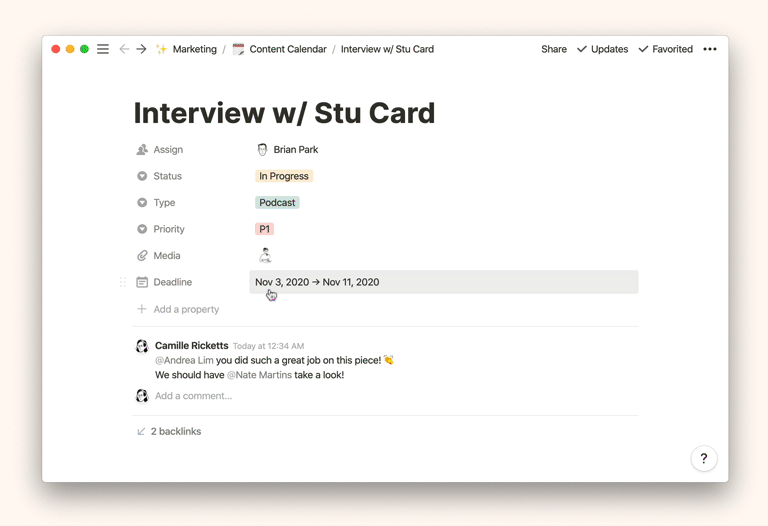
- For properties, clicking to add data will bring up our date picker, where you can select the day relevant to the database item — maybe it's an event date or deadline.
- Click to set a reminder in this property that will notify you on the date/time.
- Switch on to define a range of dates in this property.
- Switch on to choose an exact time, not just a day.
- Click to modify these settings.
- Click to remove any value in the date property.
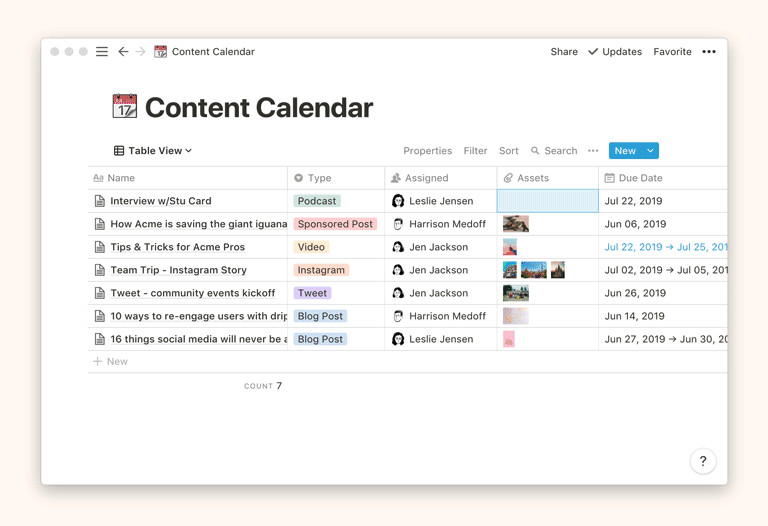
- For properties, clicking on the field provided will prompt you to upload a file, or paste a link to embed a file.
- You can also drag a file from your computer into the property to upload it.
- You can add multiple files into any field at once.
- Click on the to the right of uploaded files to , , or .
- Use the to the left of uploaded files to drag and re-order them.
- In a property, you can tag other members or guests in your workspace.
- Just type their names and press after each.
- To delete anyone tagged, click on them, then click next to their name.
- Values automatically appear for these properties: , , , .
- You can simply type (or paste) values for , , and properties, just like you would for a property.
- Editing values for and properties requires multiple steps. You can learn all about that here →
Hide & show properties
Let's say you have a task board, and you want each card to show who's assigned to the task and its level of priority — but you don't want them to show due dates or URLs. You can hide these two properties. They remain in your database, but won't show up on the cards.
- Click the menu at the top right of your database.
- Turn off the switch for properties you want to hide. Turn the switch on to show them.
- In tables, switching off a property will hide its corresponding column.
Filter
Notion makes it easy to filter your database so it only displays the items that meet specified criteria, i.e. have (or don't have) certain properties. These filters can be as simple or complex as you like!
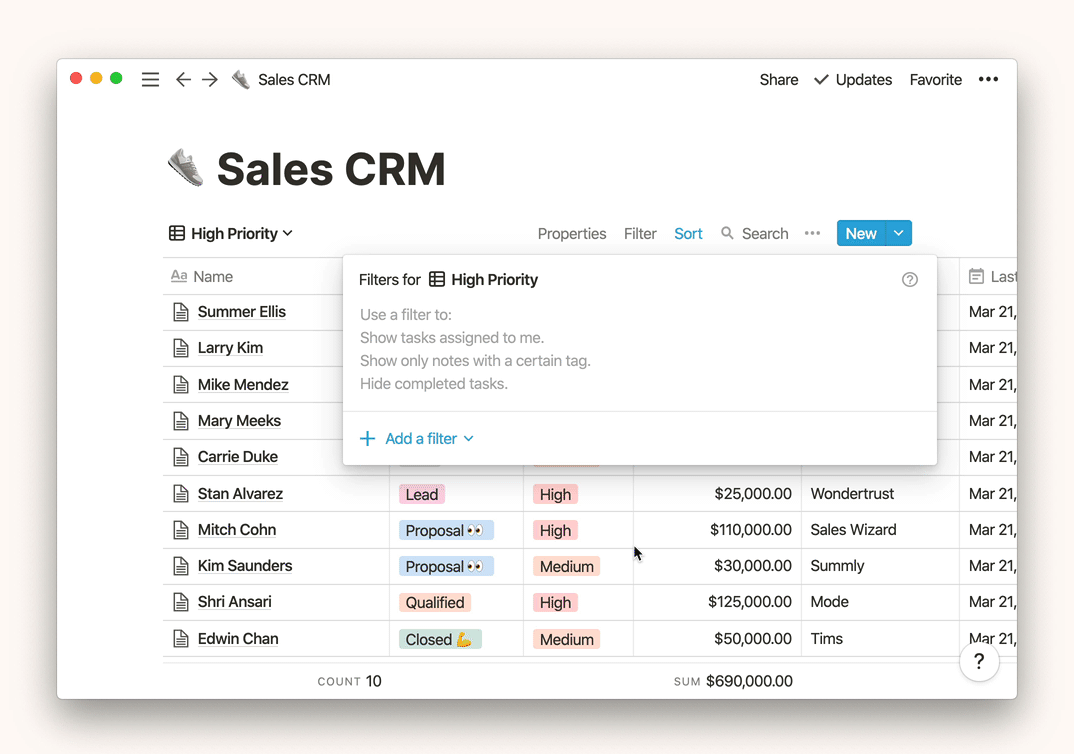
Add a filter
To filter the entries you see in a database view:
- Click at the top right of your database (you'll find it inside the next to the blue New button if it's an inline table)
- Click at the bottom left of the window that appears
- Choose the property you'd like to filter by. In the GIF below, we're filtering the High Priority view of our Sales CRM so that all the entries have to meet the criteria + + .
Tip: If you find yourself recreating and deleting the same filters over and over again, consider creating a new database view for that filter. That way, you can switch back and forth without having to recreate the filter each time.
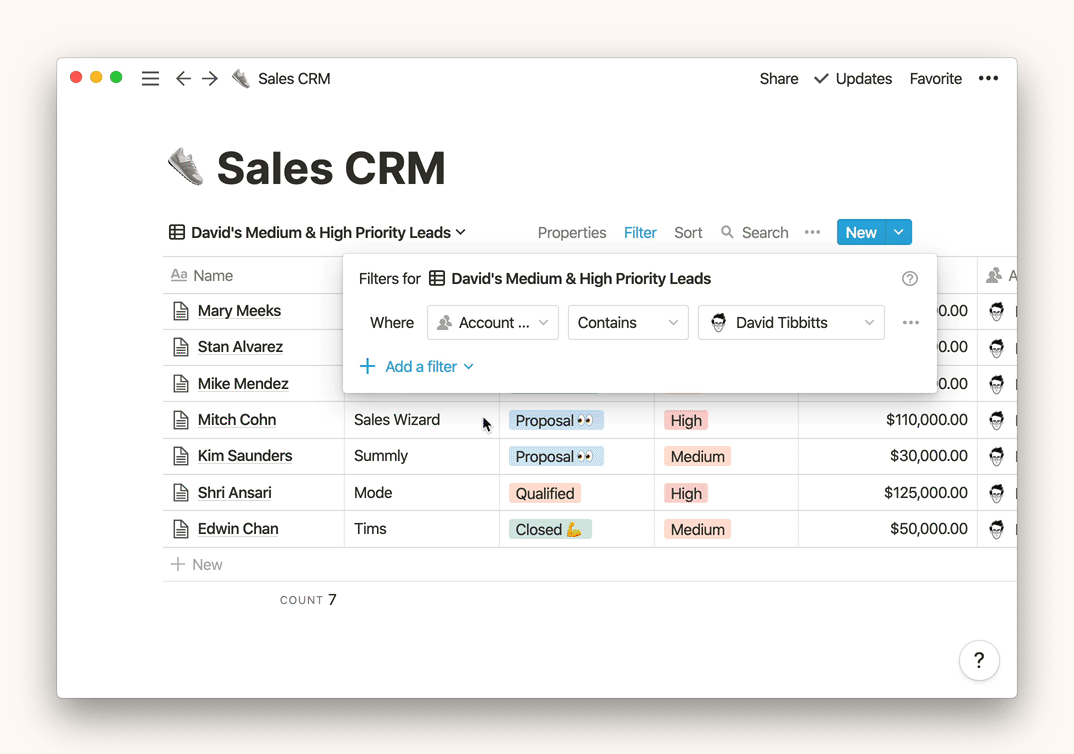
Add a filter group
You can create more specific database views and combine and logic by using filter groups. These can be nested up to three layers deep! Here's how:
- Click at the top right of your database (you'll find it inside the next to the blue New button if it's an inline table).
- Click at the bottom left of the window that appears, then select in the dropdown.
- In the GIF below, we're filtering the David's Medium & High Priority Leads view of the Sales CRM to meet criteria that include both and logic.
Tip: You can quickly turn a filter into a filter group by clicking the ••• to the right of the filter, and selecting .
Sort
You can sort your database so that items are displayed based on properties appearing in ascending or descending order.
For example, you can order them based on priority, or last edited, or alphabetically.
- Click at the top right of your database, then .
- Choose the property you want to sort by, and whether you want it or . Your database will change immediately.
- You can add as many sorts as you want, or remove them by clicking the to their right.
- Change the order that multiple sorts are applied by dragging them up or down using .
- For and properties, you get to define what sorting order means.
- Click on the property, then drag tags up or down to tell your database what ascending or descending order should look like (i.e. P1, P2, P3 for priority).
Views
You can view the same database in multiple ways, and switch back and forth between them depending on your needs in the moment. Here are all your choices:
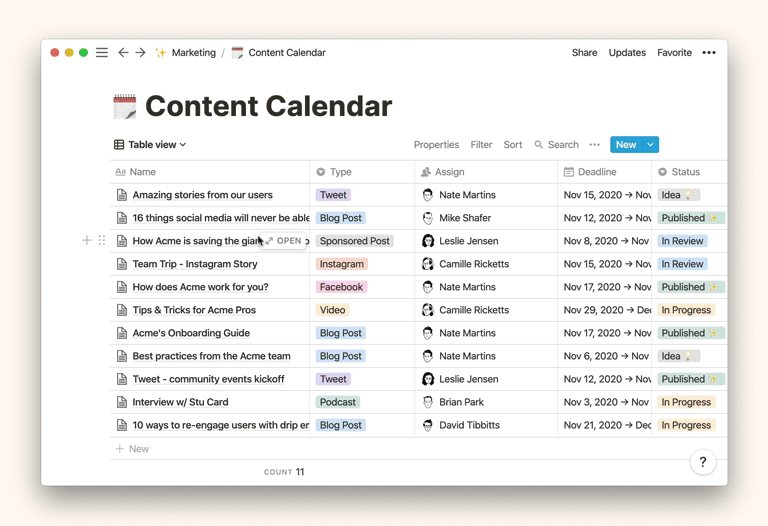
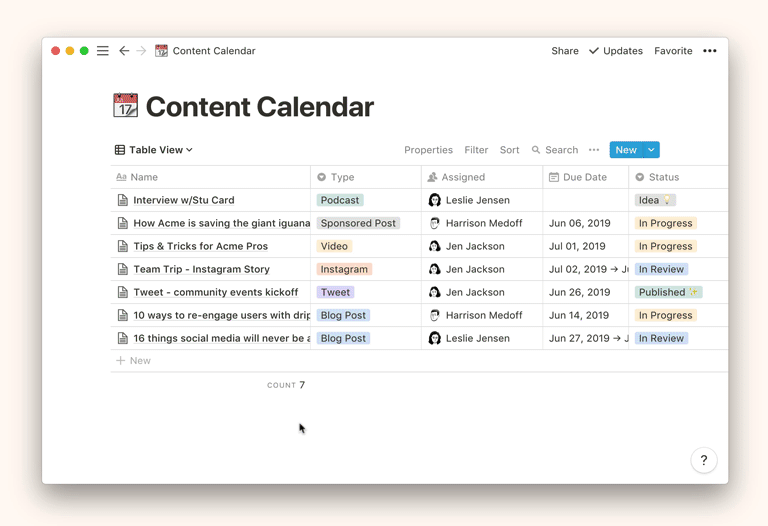
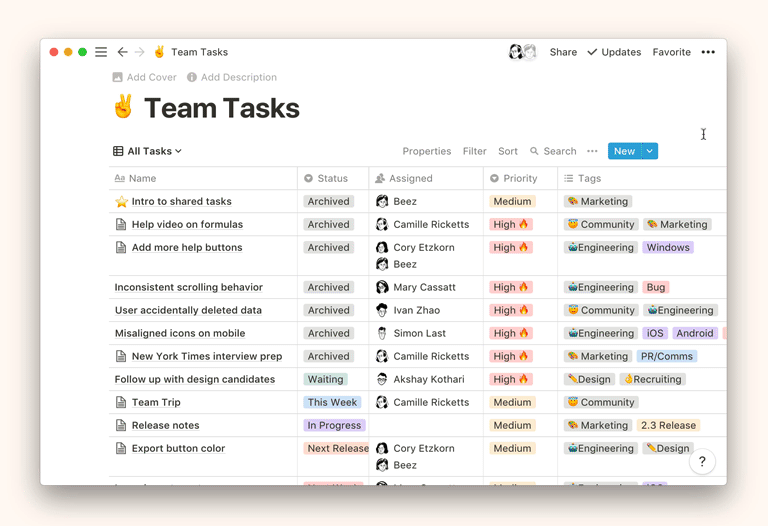
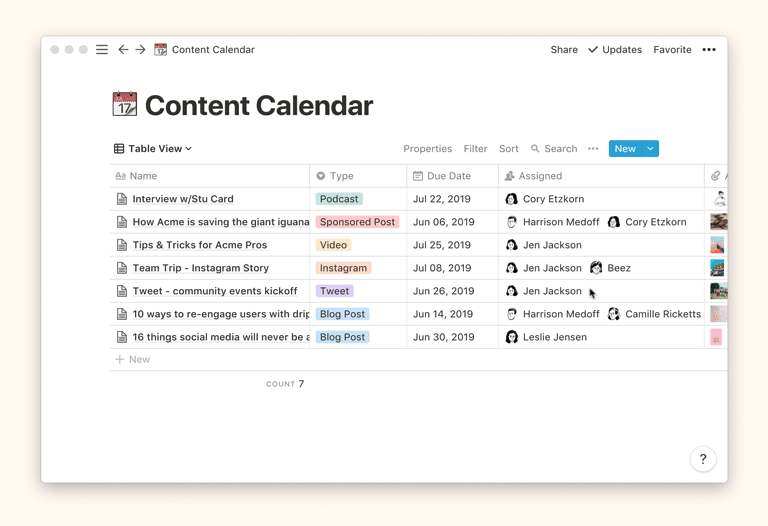
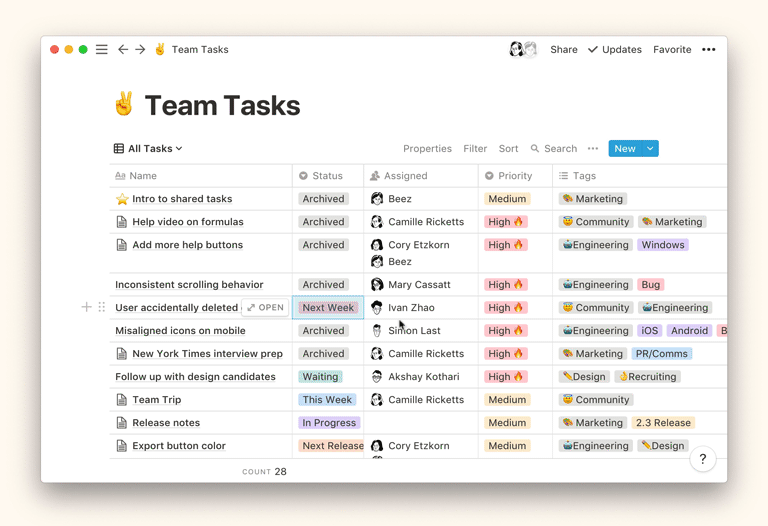
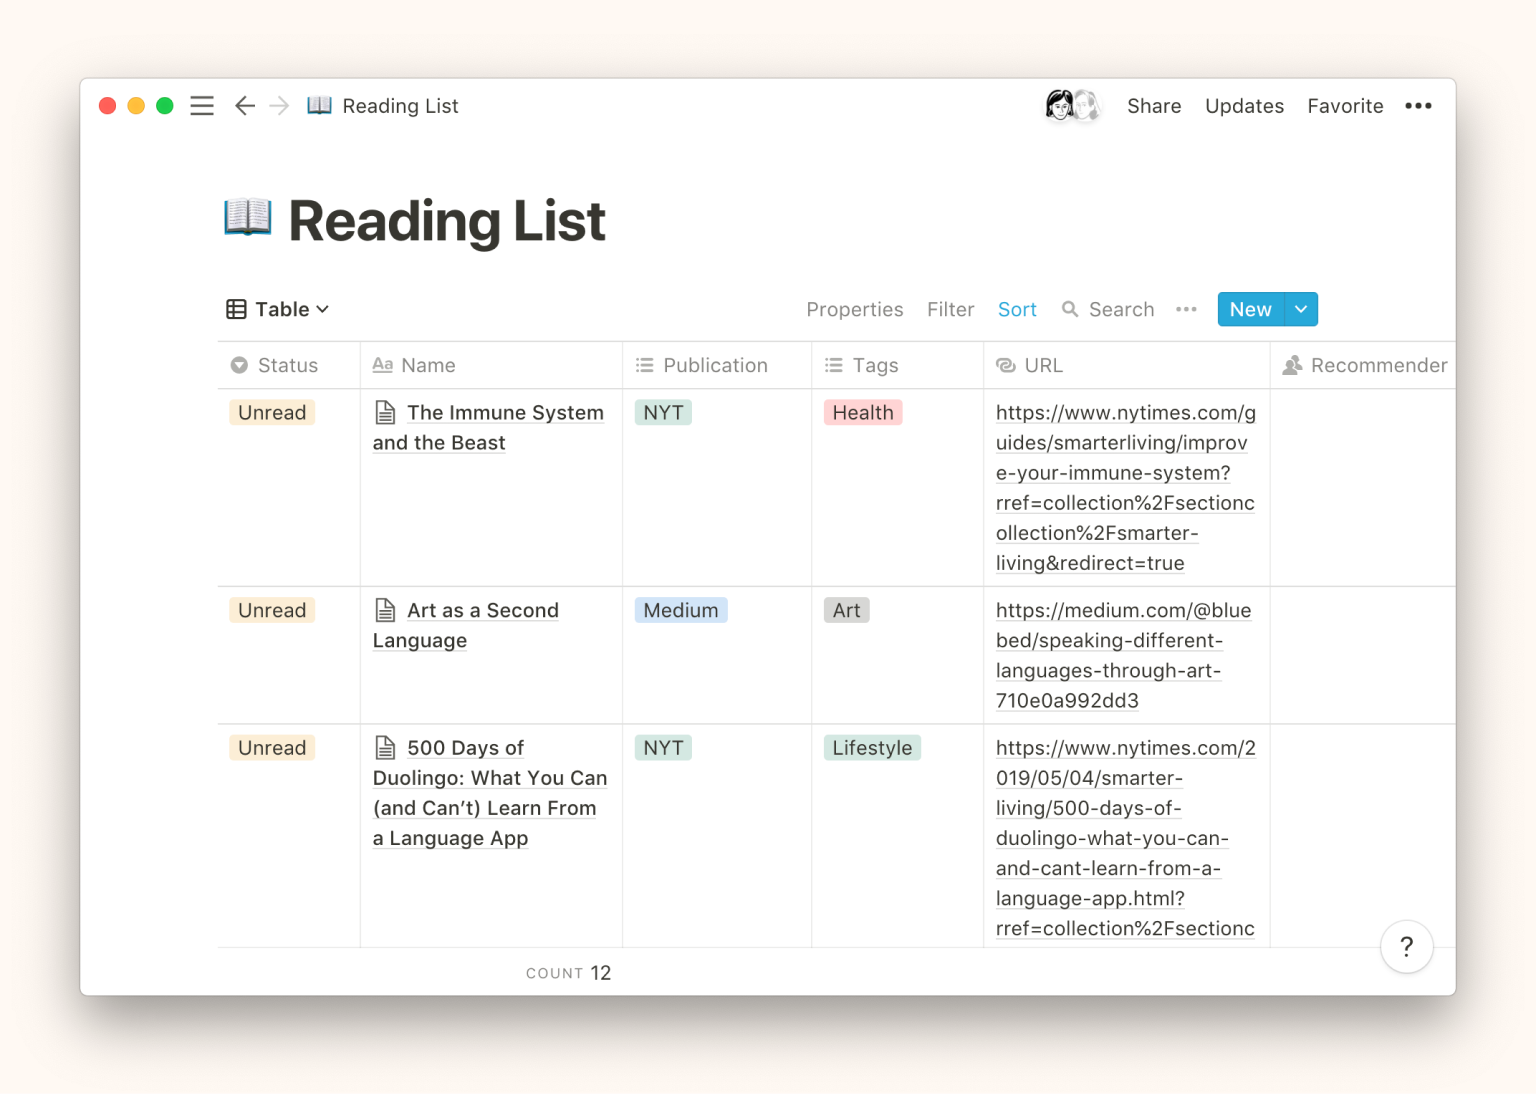
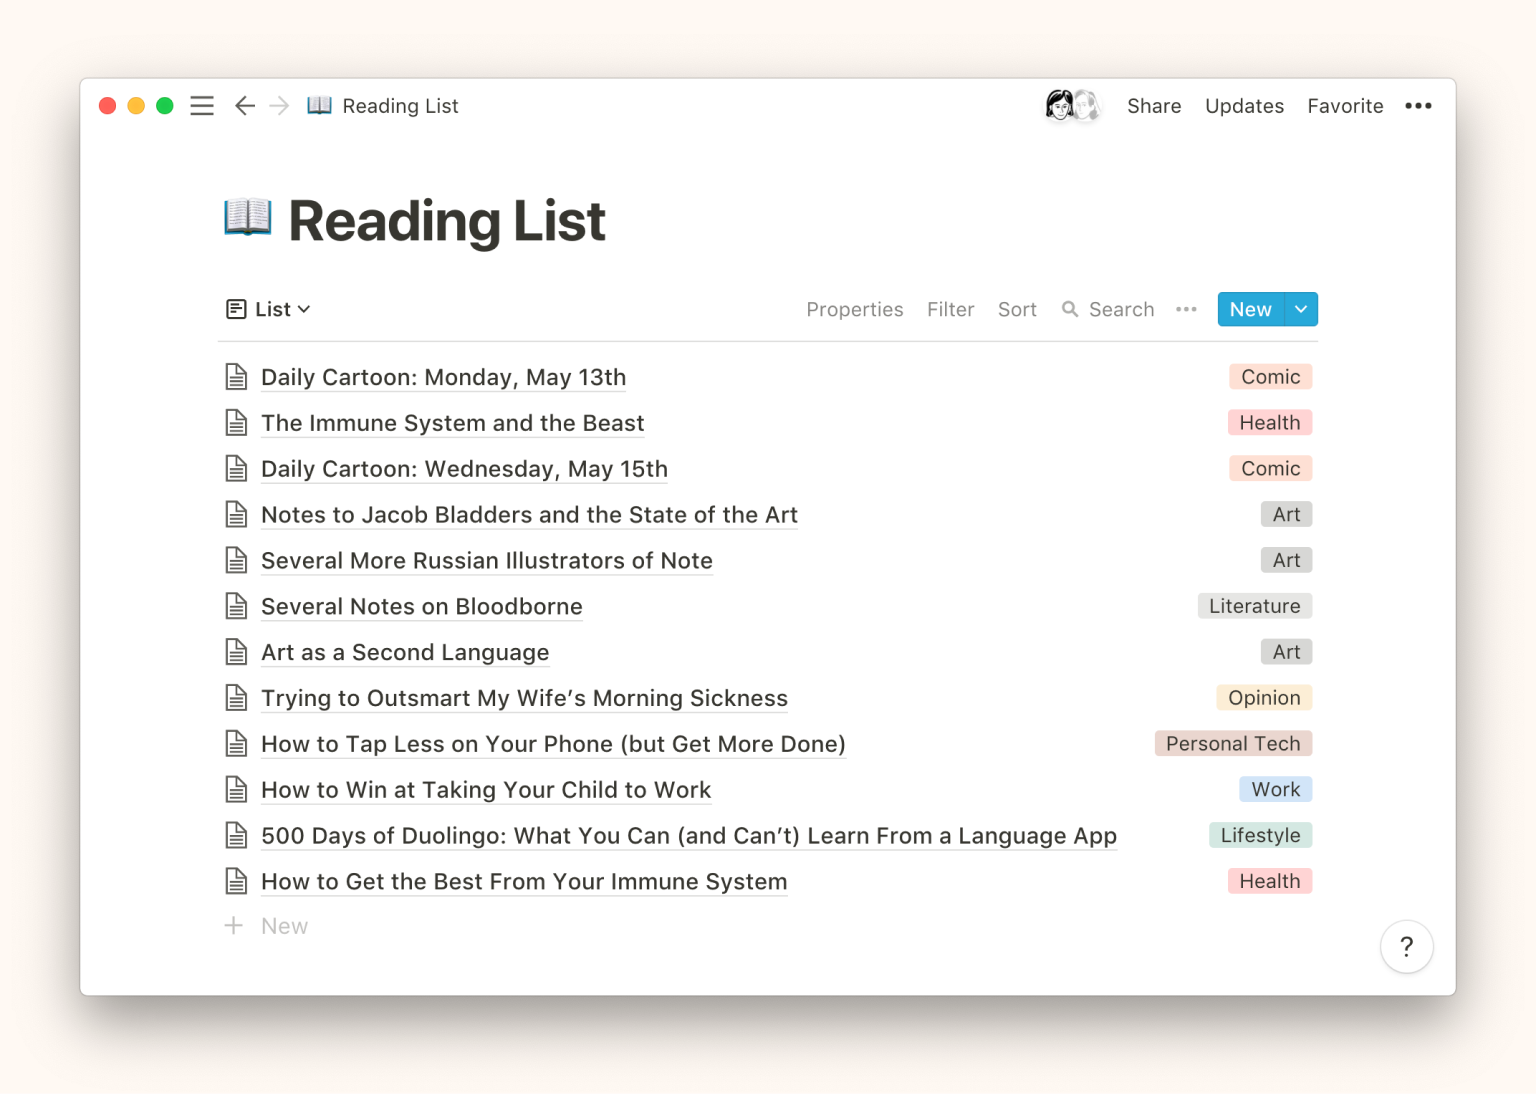
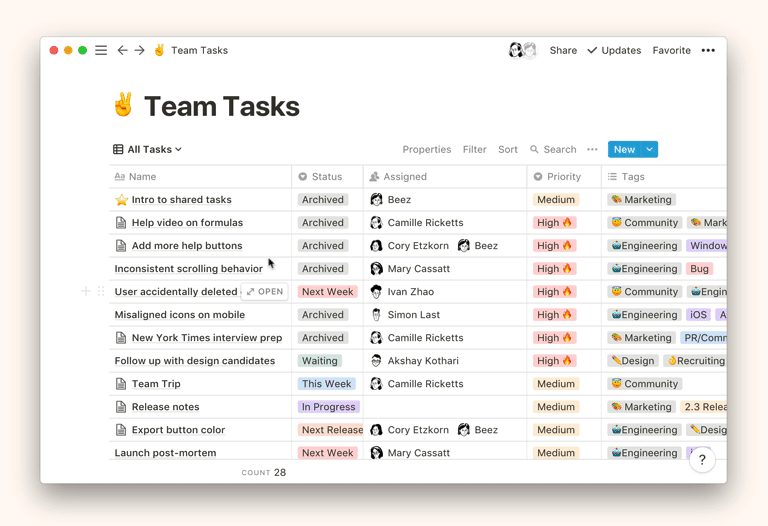
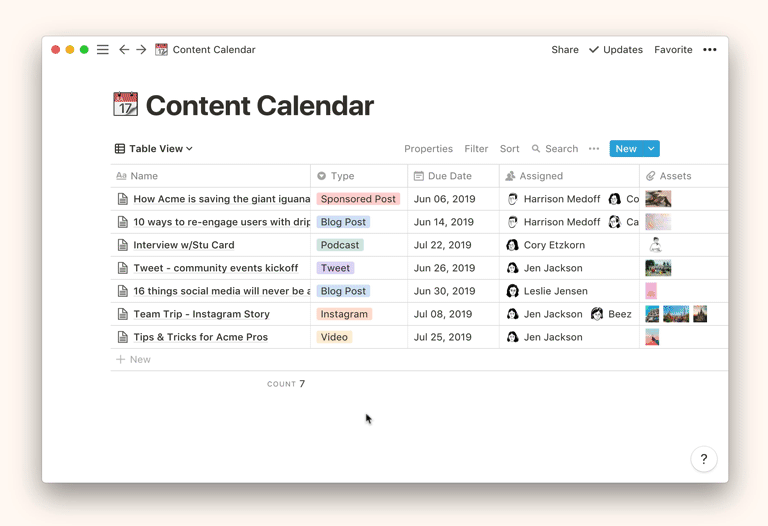
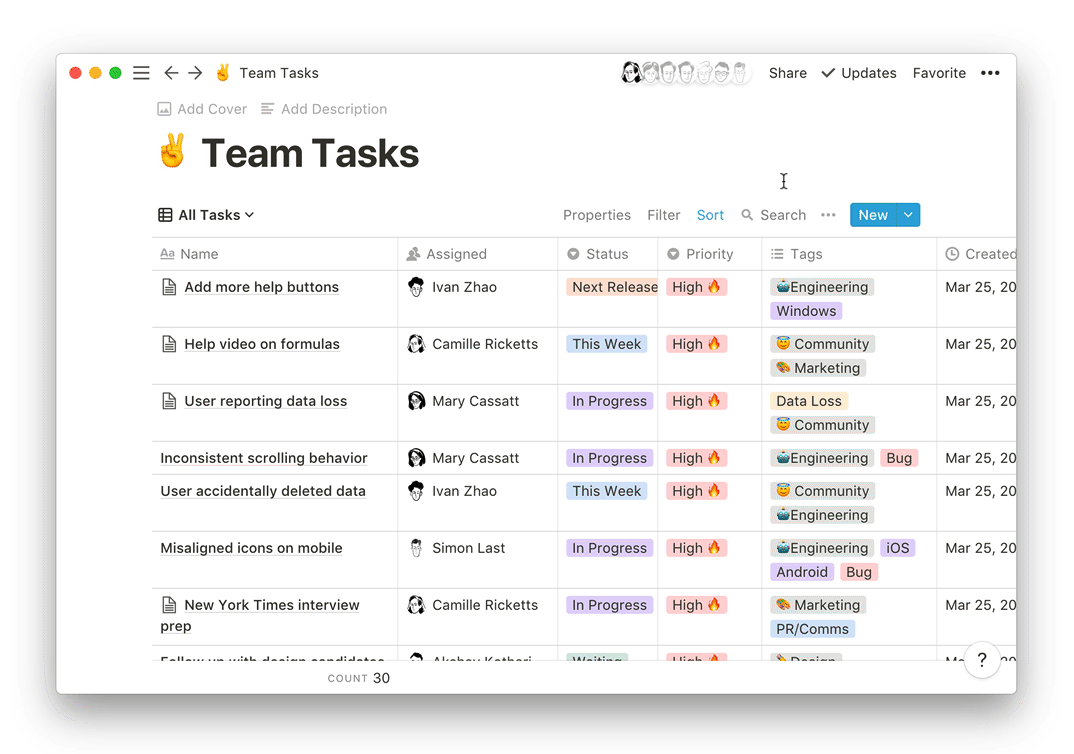
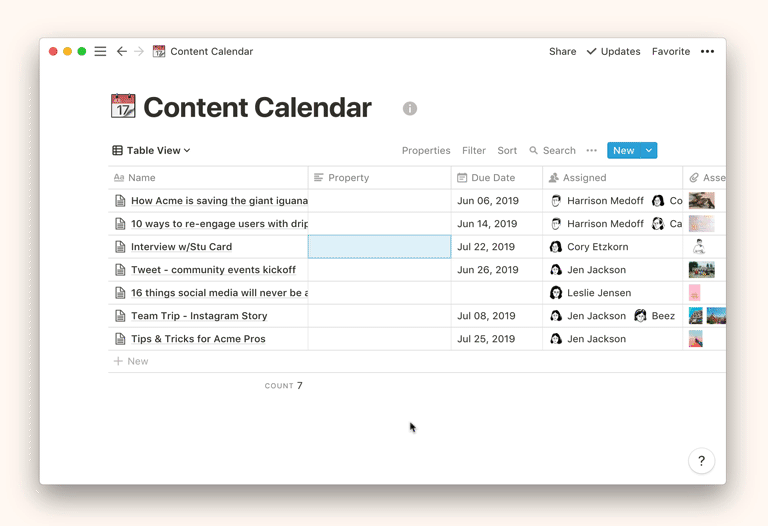
Table view
- This is the most traditional way of viewing a database. It allows you to see your dataset as rows of pages, with every property represented by a column.
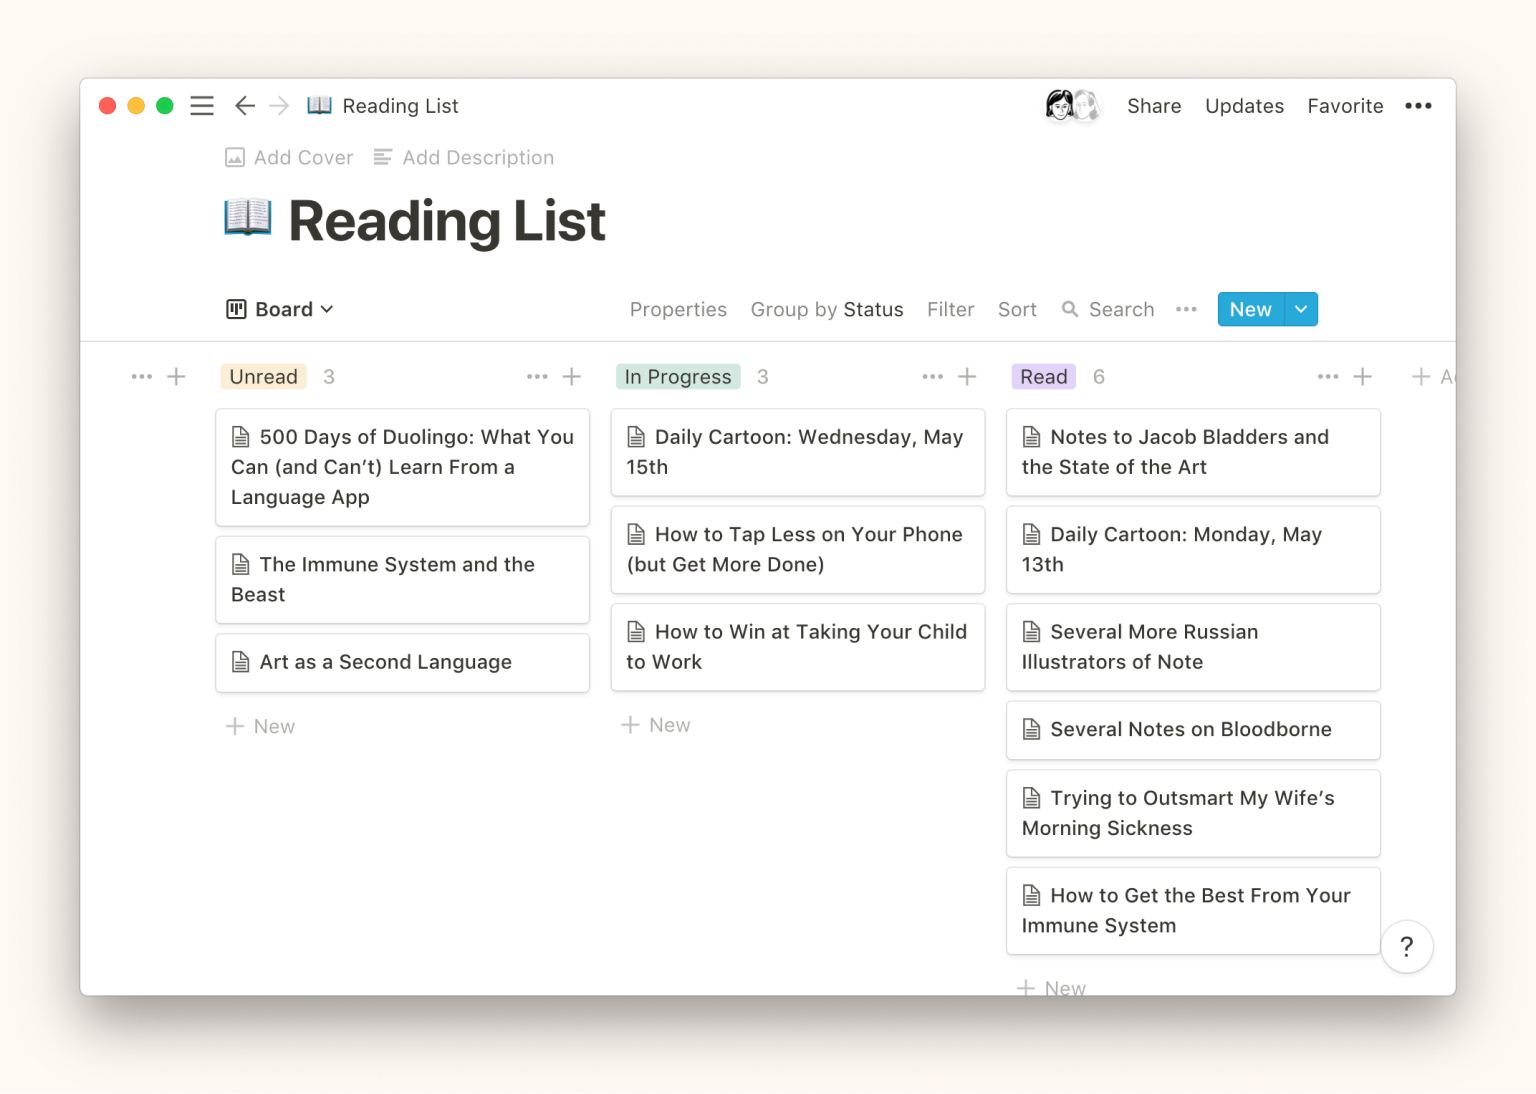
Board view
- This view groups your items by property. For example, use it as a Kanban board to move an item through phases of a process.
List view
- A minimal, vertical layout of your items that lets you open them as a page with one click.
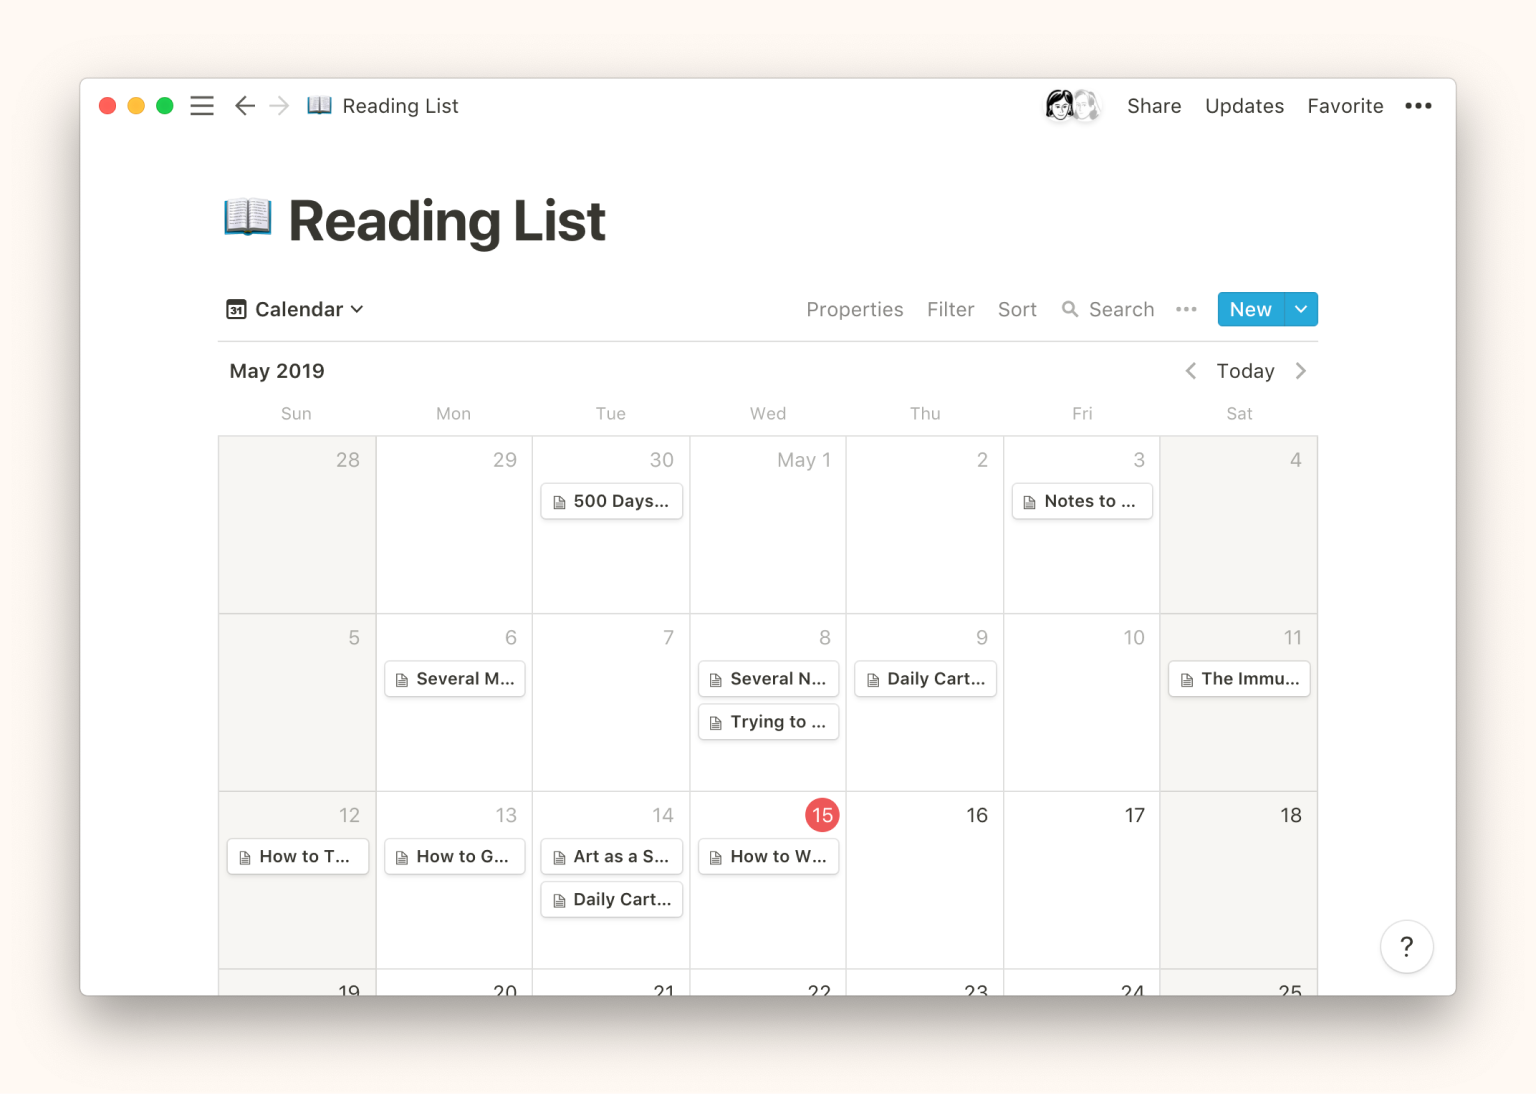
Calendar view
- Displays your items based on their property.
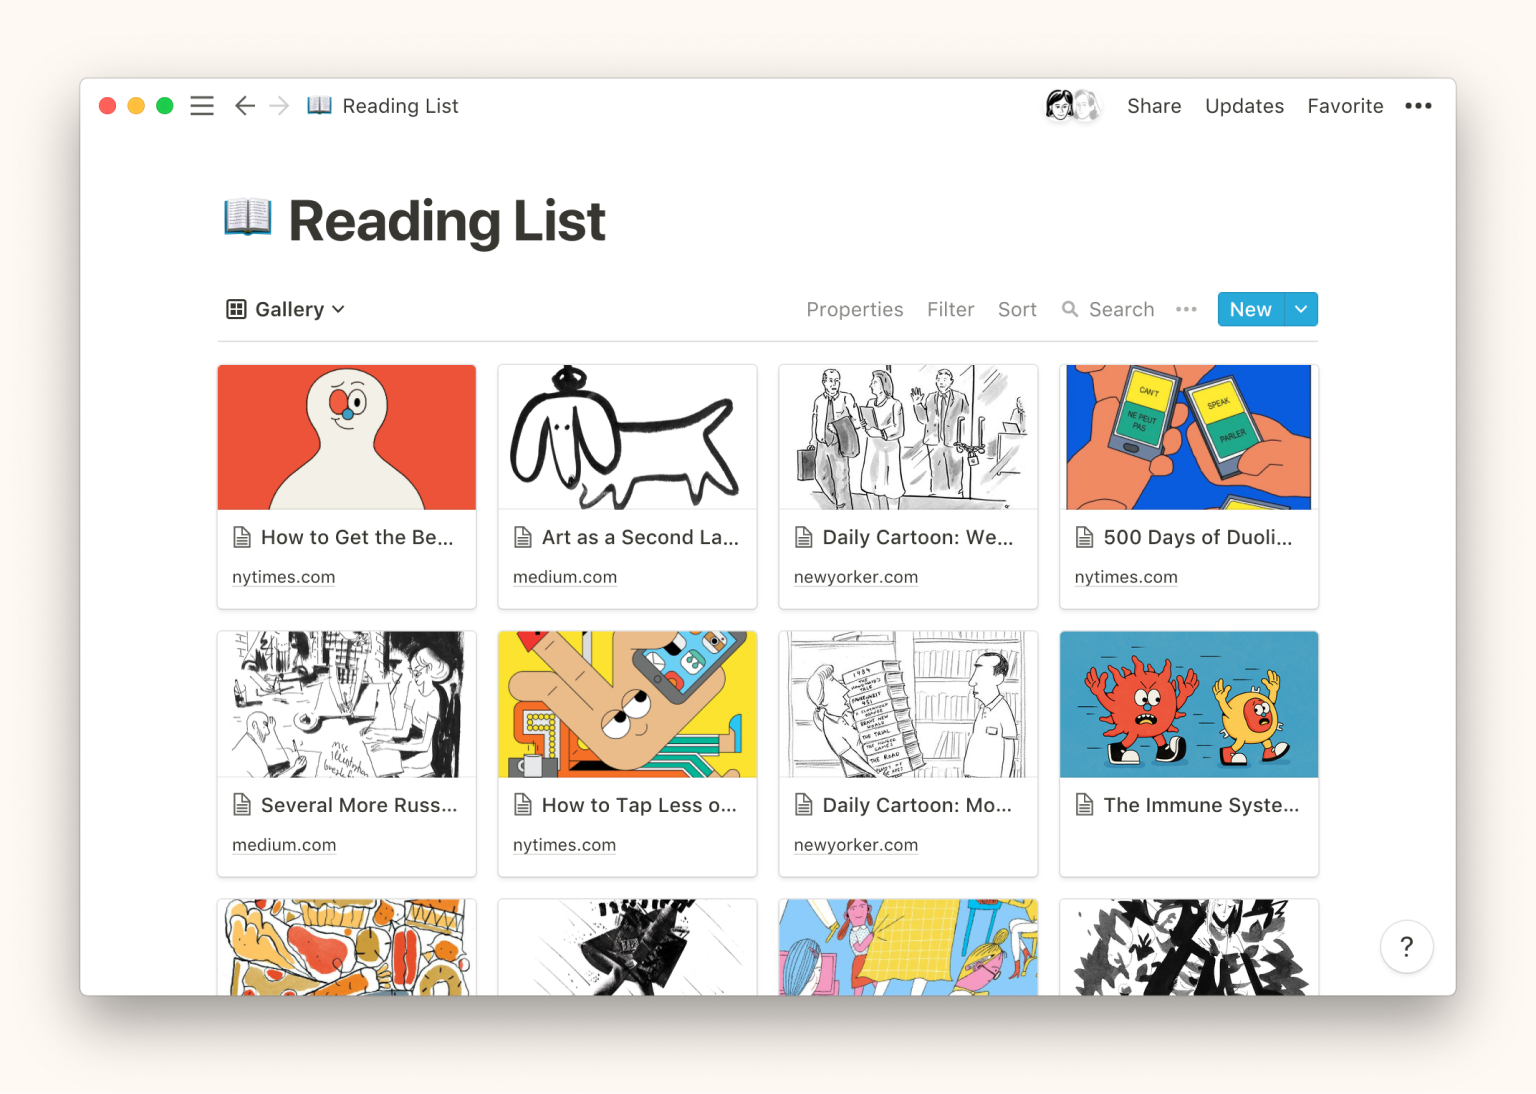
Gallery view
- Use your database to display images. You can edit your gallery to show images contained in the property, or inside each page.
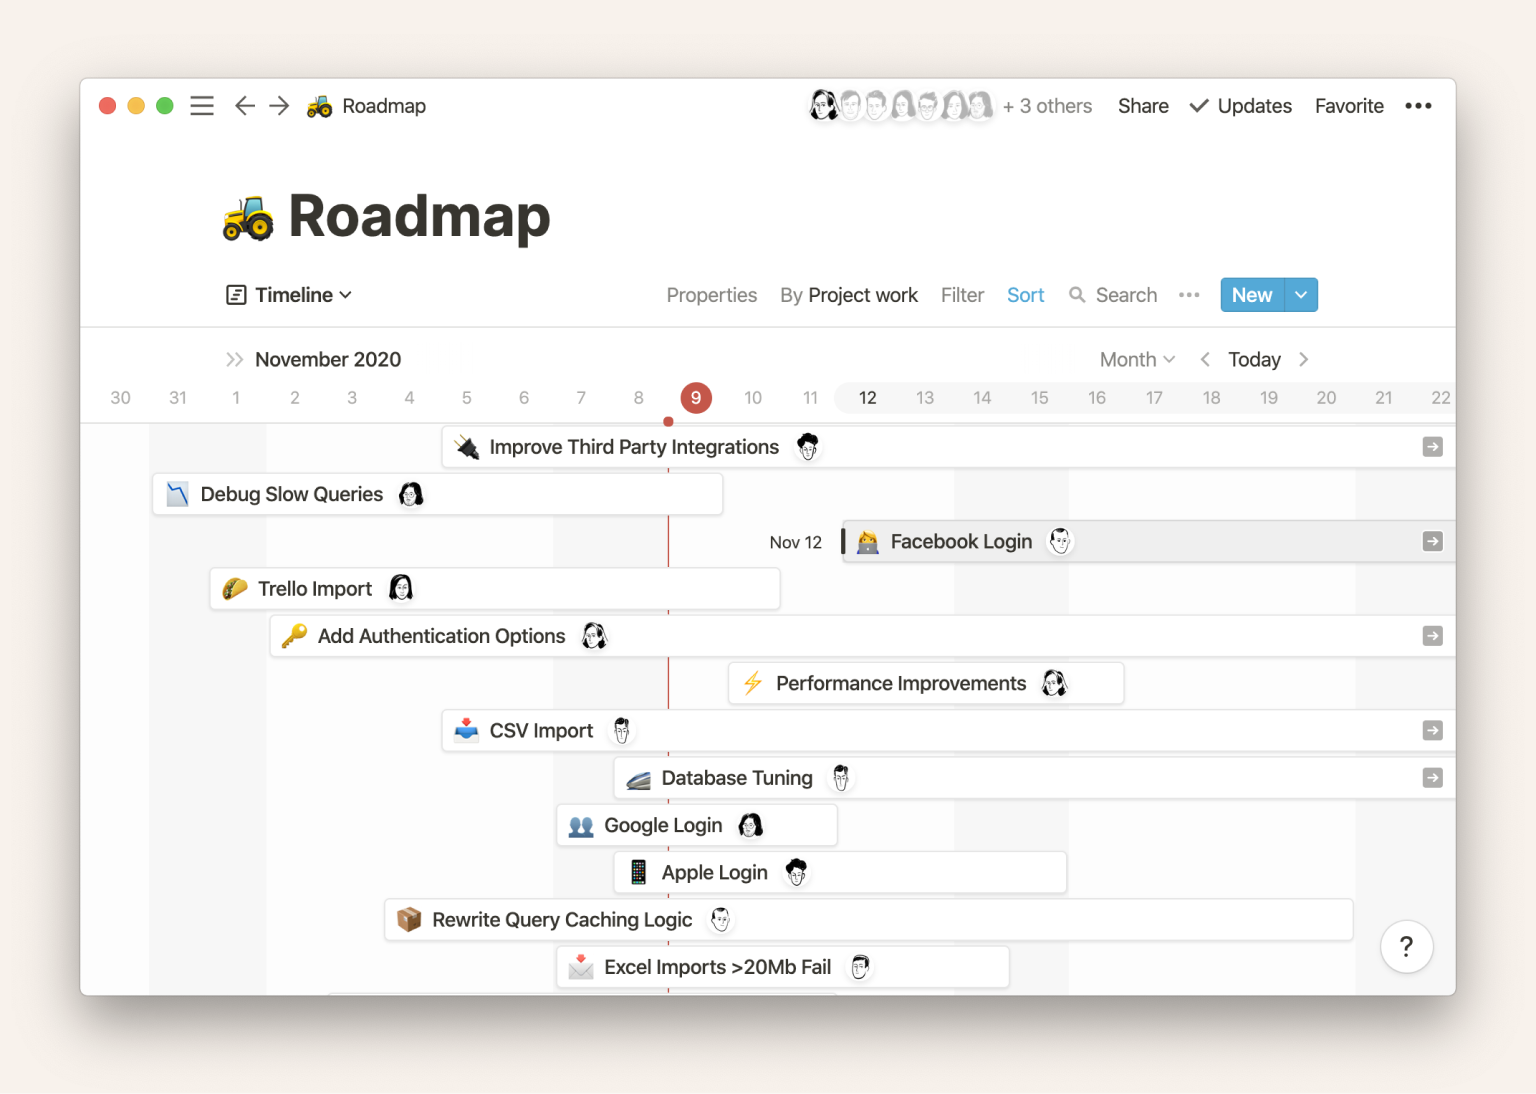
Timeline view
- Use your database to plot projects on a timeline so you can visualize when they are taking place and how long you think they will take to complete.
- Timelines require you to use a date property in order to display information.
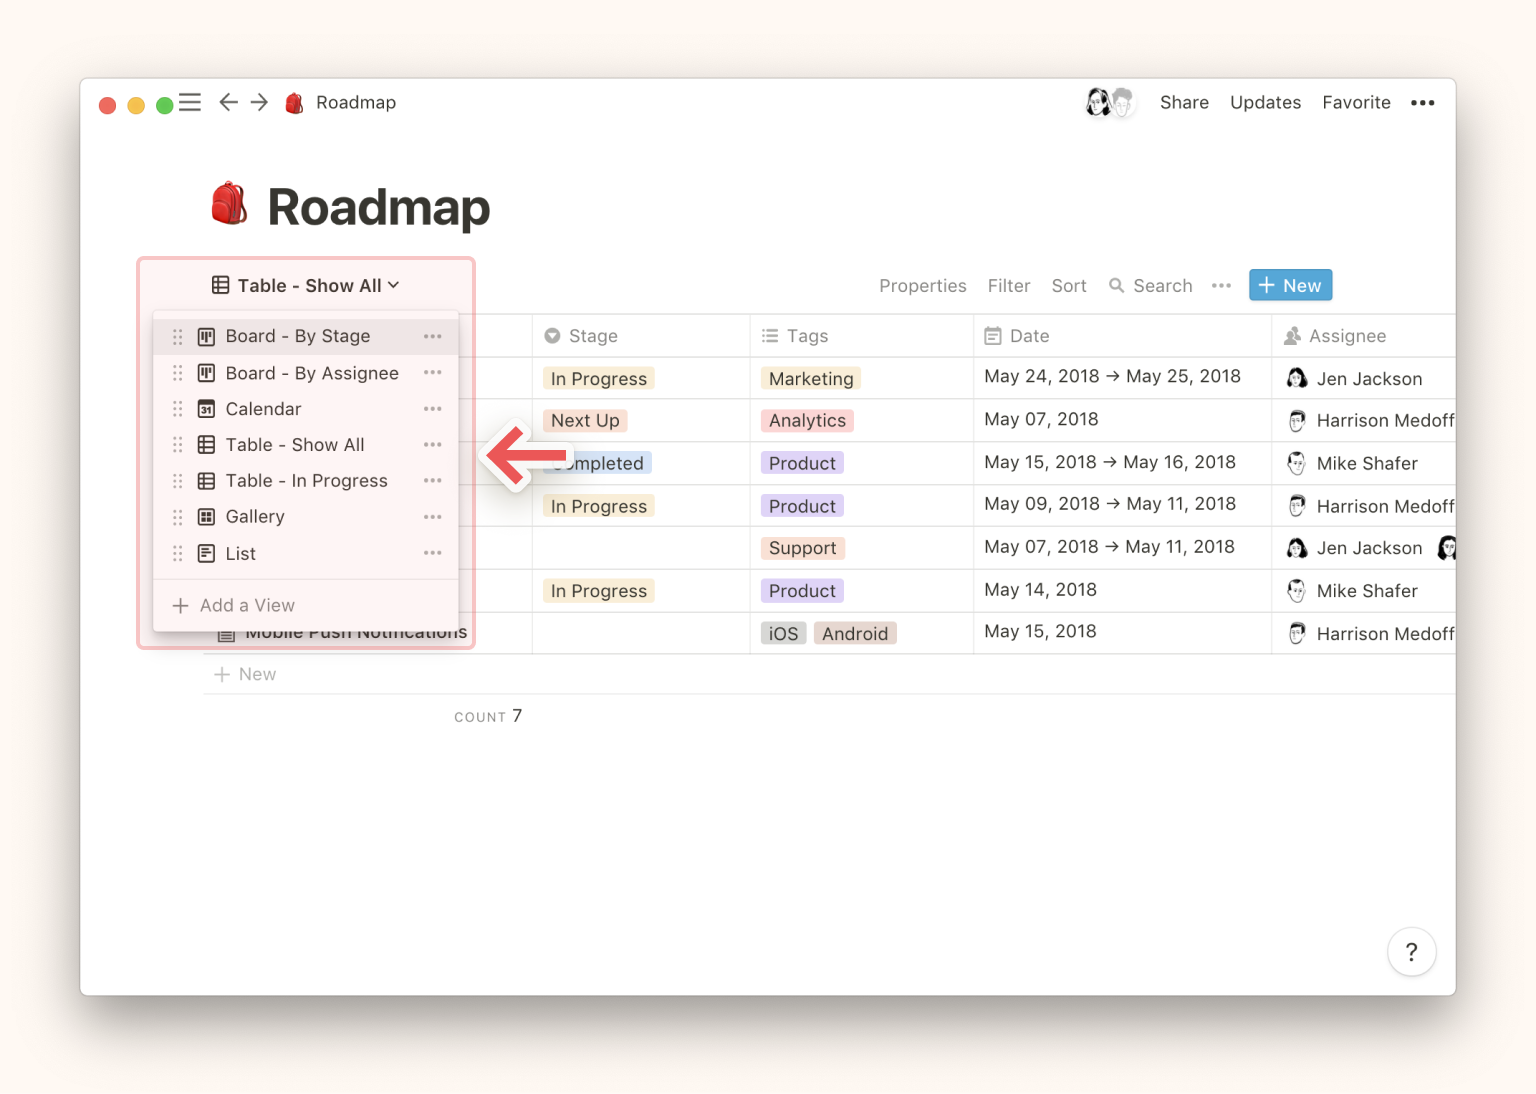
Create a view
Everything to do with views can be controlled from the dropdown at the top left of your database.
- If you don't have any views yet, click the button at the top left. This becomes the dropdown menu where you can see, add and select views.
- Give your view a name in the text box, and choose the type of view you want it to be.

- When you have more than one view, you'll see the name of your current view at the top left. Clicking it opens a dropdown menu where you can switch between views or add a new one.
Edit views
Click the name of your current view to see a dropdown of all your existing views.
- Click to the right of any view to edit the type of view it is (table, board, gallery, etc.), rename it, it, or the view.
- Re-order your list of views by dragging the icon next to any view up or down.
Filtered & sorted views
Views aren't just about toggling between tables, boards, lists, etc. You can also create views of your database with different filters and sorts applied. That way you don't have to re-create a filter whenever you want to see it.
- Create a new view in your database by clicking .
- Choose the type of view you want and give it a name.
- Then apply the filter or sort by clicking or at the top right of your database. Set the criteria you want, and your database will respond.
- Now, whenever you want to revisit that filter or sort, you can just click on the name of your current view, and select the filtered/sorted view from the dropdown.
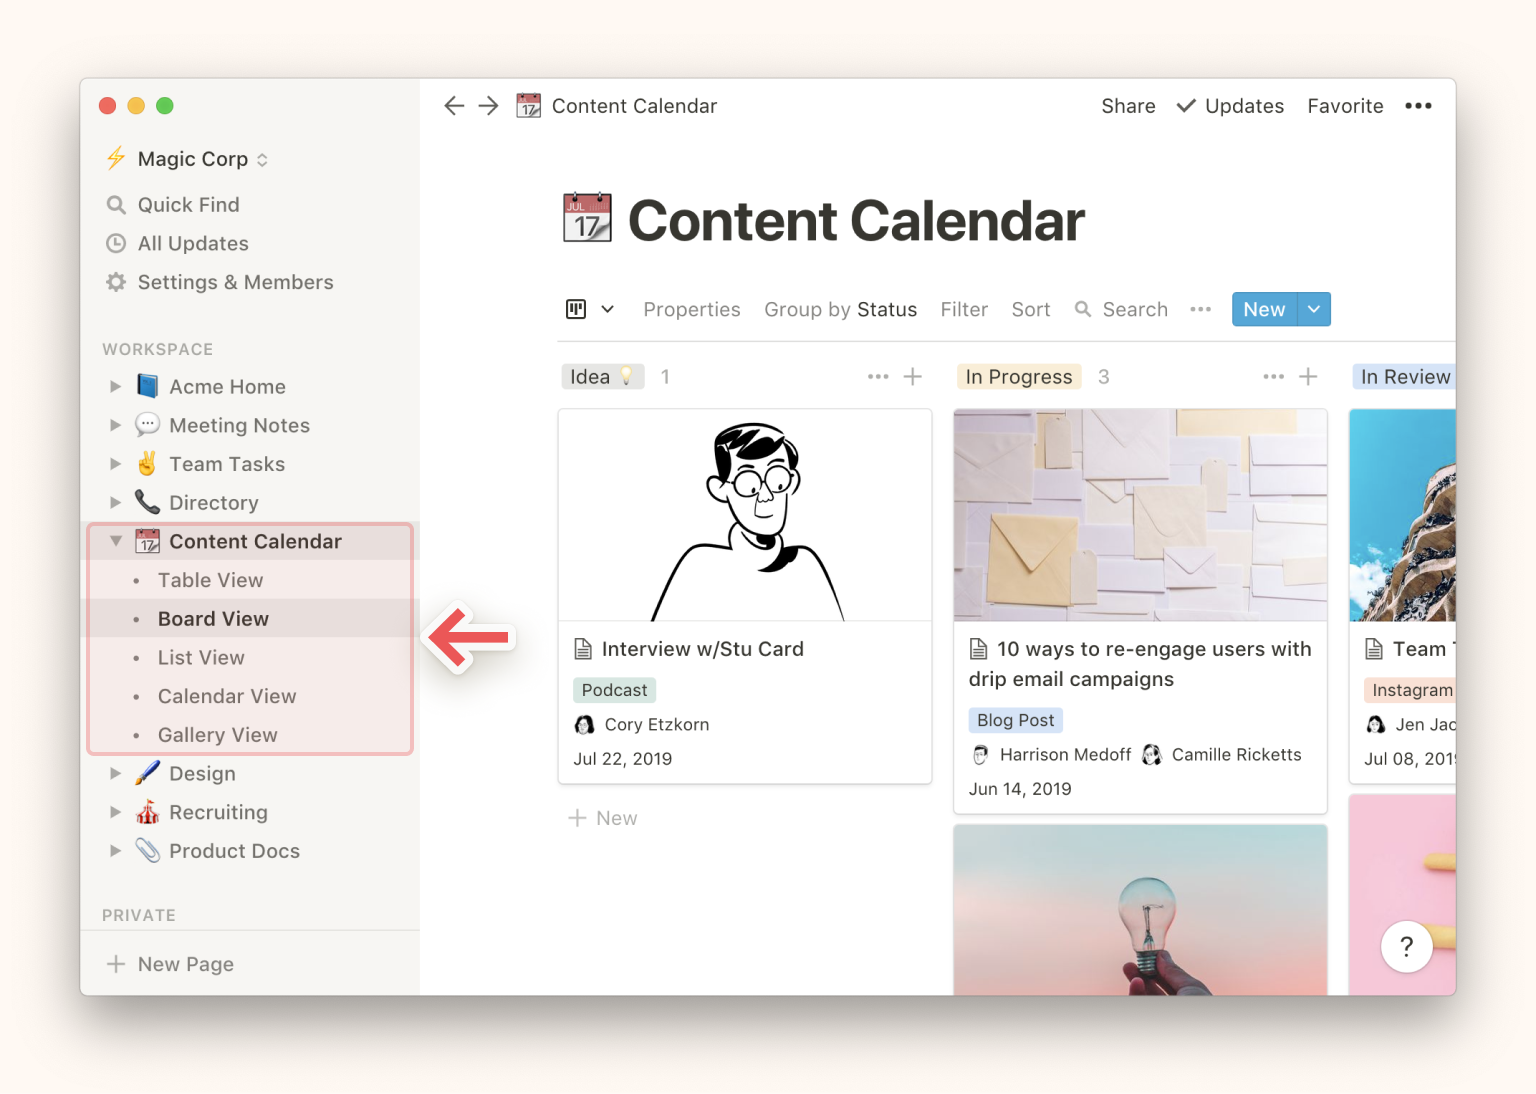
Navigating views
In your sidebar, views show up as nested items inside any full-page database. You can tell they are views because they'll have a to their left.
- Click on any view in your sidebar to jump right to it.
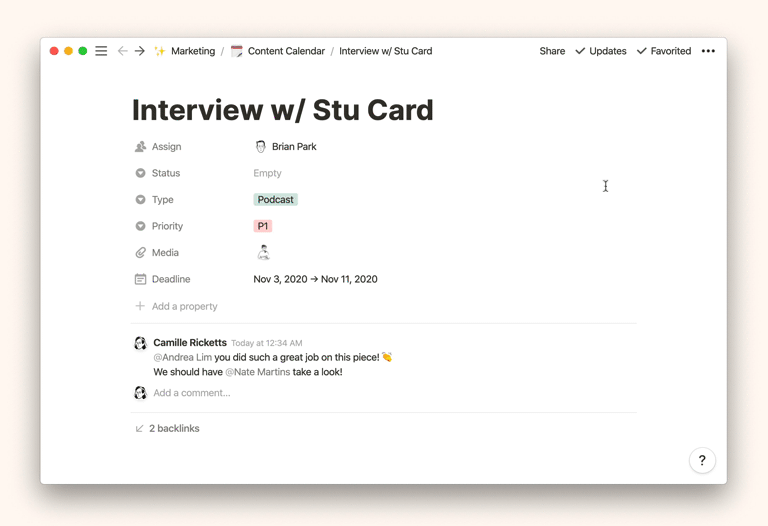
Open & edit database pages
Every item in your database, whether it's a row in a table or a card on a board or calendar, is its own Notion page that you can build, format and nest content in like any other page.
Here's how to open database items as pages:
- In tables, hover over your first column and click the button that appears.
- In lists, just click on the title of the item.
- In boards, calendars, and galleries, click anywhere on the card.
- Pages will always open in preview mode. Click at the top left to view in full-page mode.
- In this page, you'll see all your database properties at the top. You can edit them in this view. Just click their fields.
- Click the that appears to the left of each property on hover in order to: drag it up or down, change the , rename it, or it.
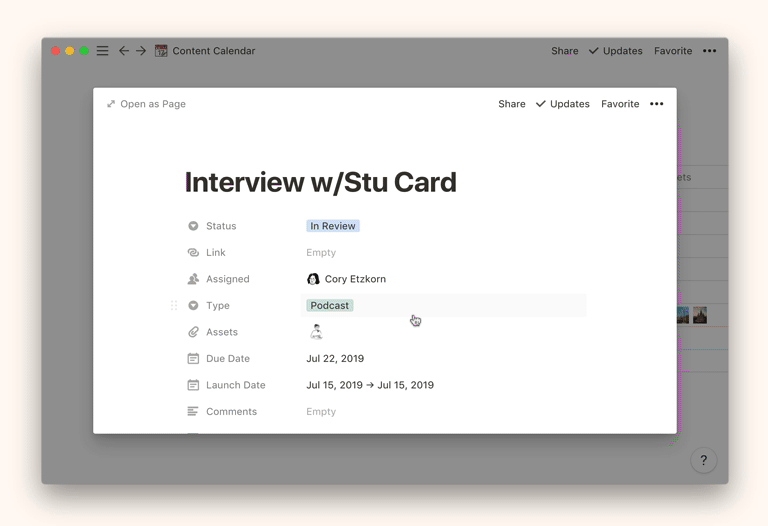
- Underneath your properties is free page space, where you can add any type of content block, including sub-pages or an in-line database.
- Because database items are pages, any other type of content you drag into a database (like bullets or to-do items), will automatically turn into pages.
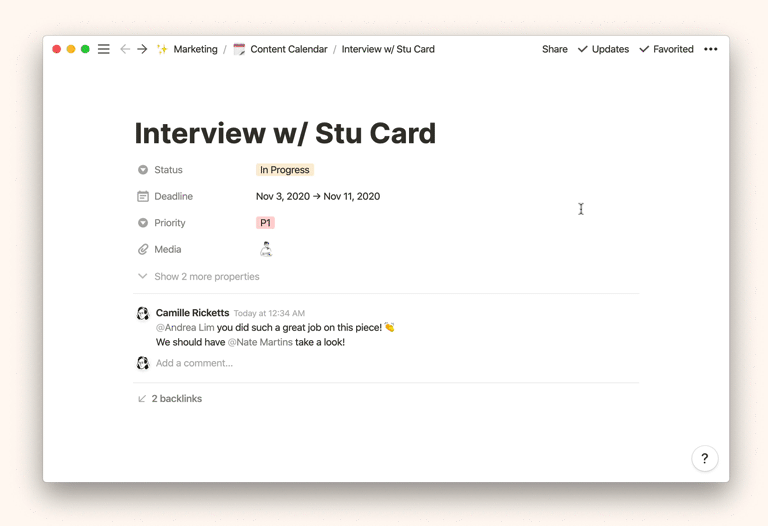
Customize database pages
The top section of any page in a Notion database can include several things:
- Properties provide data about the page you're looking at, like project owner, due date, tags, and more.
- Comments capture conversation between you and your teammates. You can use them to tag each other, ask questions, provide feedback and more. More on comments here →
- Backlinks indicate all the pages that link to the current page so you can easily navigate between them. More on backlinks here →
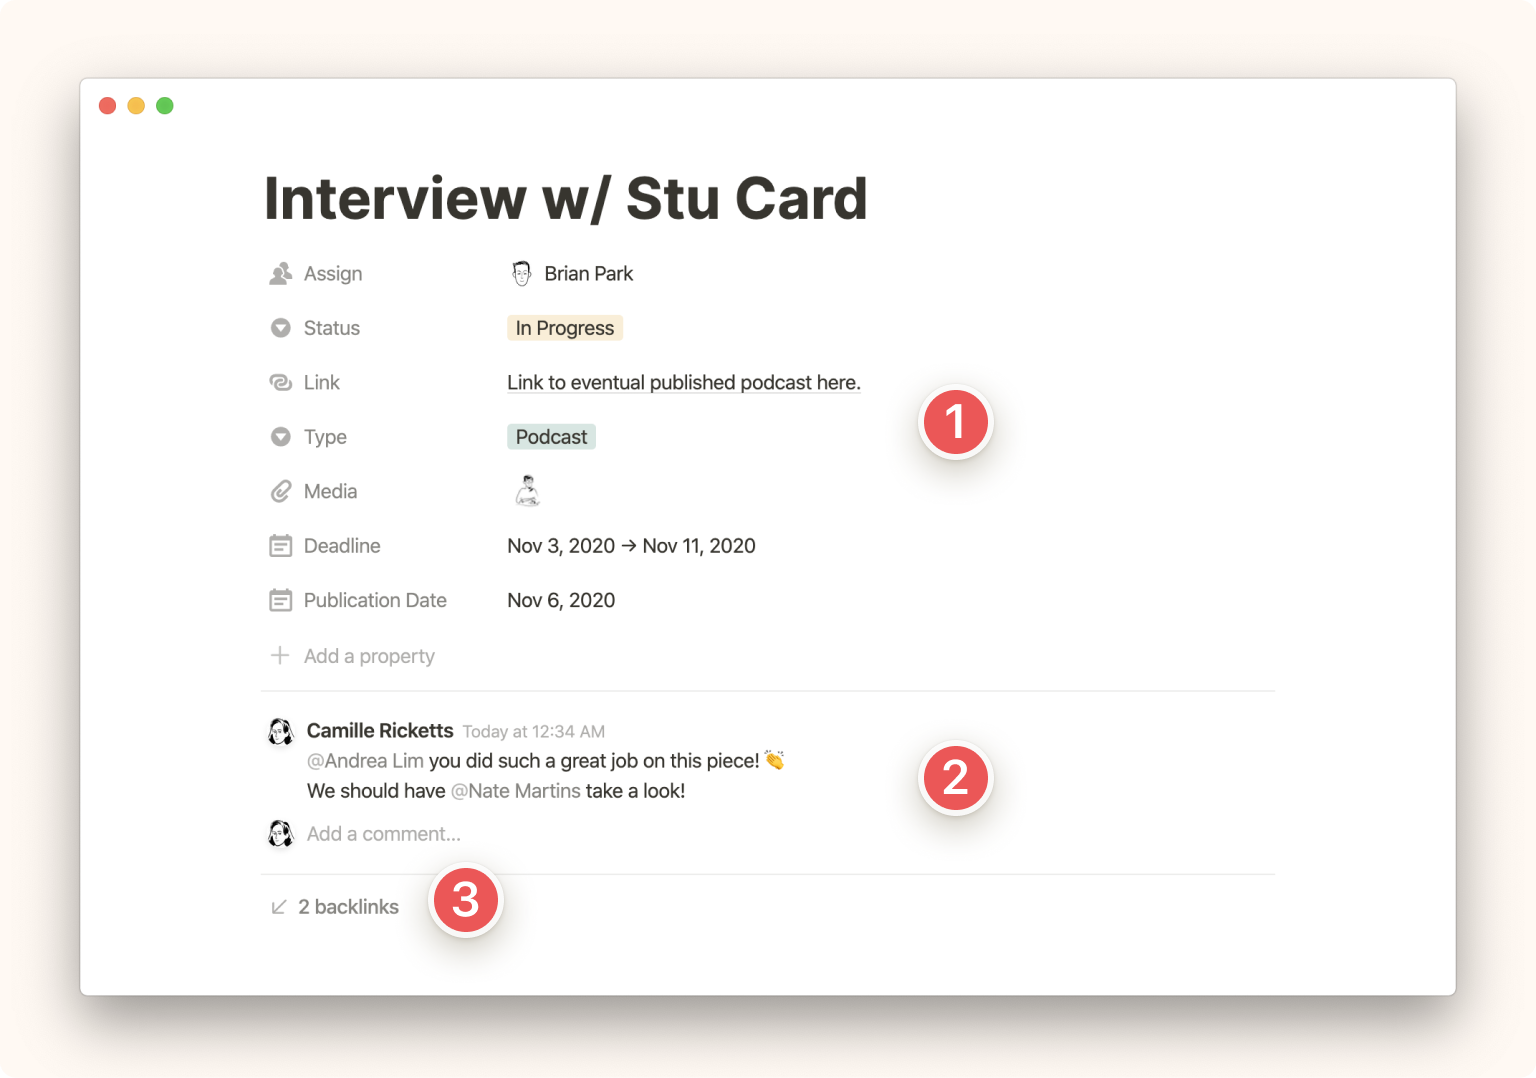
As with everything in Notion, you can customize the look and feel of these components. To access these options:
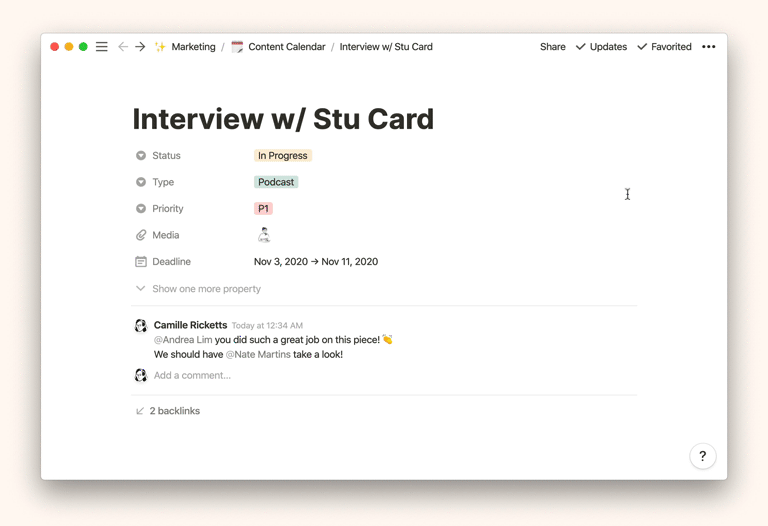
- Click the at the top right of any Notion database page and select .
- You'll see this window pop up:
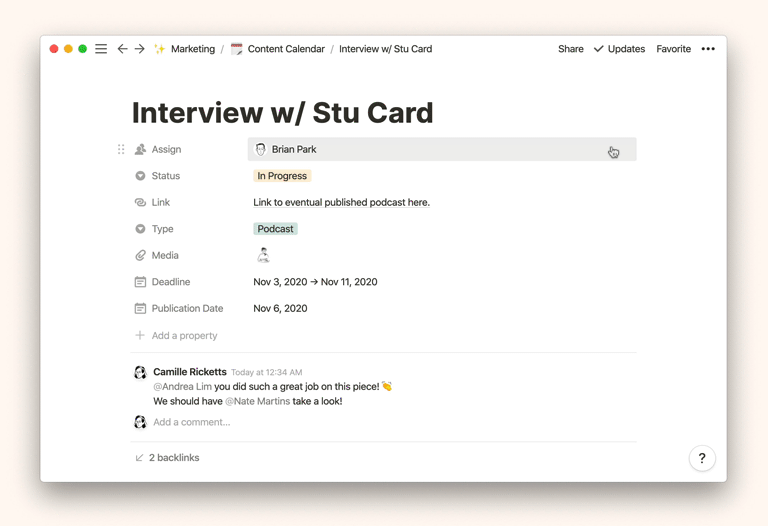
For properties, you can use this menu to choose which property fields you want to show at the top of the page, and how. For each one, select from:
- Always show - Nothing changes, you continue to see the property field.
- Hide when empty - The property field will disappear from the top of your page if it has no value in it.
- Always hide - The property field will not show up at the top of your page.
Tip: If you have a database with dozens of properties, this is a great way to keep your pages streamlined so you don't have to scroll a ton just to get to your page content.
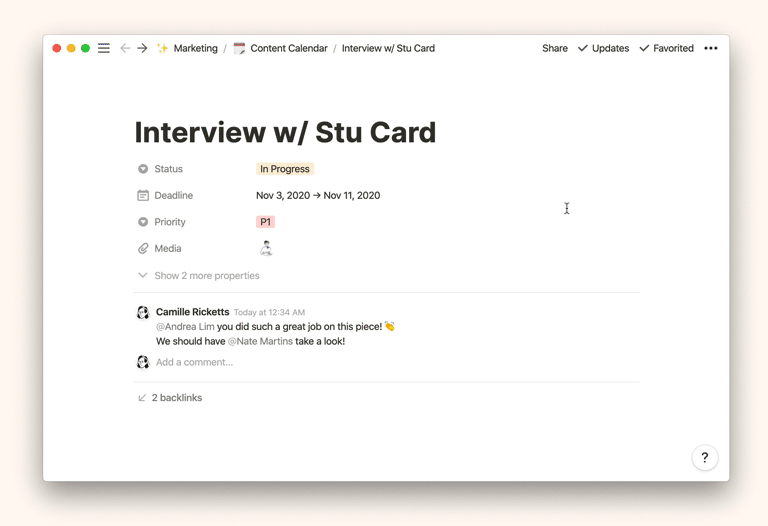
- You can also access the menu by clicking the icon next to any property in the list at the top of your database page.
Note: When you hide properties, they get aggregated in a single menu item at the bottom of the list. You can click this to easily show any hidden properties.
- The icon that appears to the left of your properties in the menu can also be clicked and dragged up or down to reorder how properties are displayed on your page.
For backlinks, you can choose:
- Expanded - See all the pages that link to the current page listed in full.
- Off - Just hide all backlinks entirely.
- Show in popup - In case you don't want to see all the pages, you can choose to see just the number of backlinks. Click to open a popup displaying all the pages.
For comments, you can choose to show them:
- Expanded - Show the full conversation at the top of the page.
- Off - Hide comments on the page for a minimalist view.
Menus & options
Every full-page database has the same menus and sets of options. Here's a quick walkthrough.
- View menu: At the top left of your database. Lets you add, switch between, and edit all the different views of your database.

- menu: Toward the top right of your database. Let's you add, edit, hide and show properties.
- For boards and galleries, you can choose (small, medium or large) and (which image you want to display if any).
- If you do display an image, turning on makes sure the entire image fits inside the card frame. Otherwise images will be cropped to fit the frame.
- Turning off in this menu hides the title of the card, allowing you to only see images.
- Learn more about displaying images with here →

- and menus: Both let you specify criteria for the data you want to show. You can add as many as you want. They'll be applied in the order they're listed.
- : You can type in any word, whether it's in the name of a database item or in a property, and your database will change to only show items that fit that search.
- : Located at the top right of your database, this is an odds and ends menu where you can , and see who edited the database last and when.
- Includes the option to in tables so text can run on multiple lines.
- button: Click this to add a new item into your database that instantly opens as a page. Click the down arrow to the right of this button to access database templates.
- : Find this option in the menu at the very top right of the Notion window. Switch it on to prevent anyone from changing properties and views in your database. They'll still be able to edit the data it contains 🔒
- : Is a menu you'll only see for boards. Click it to group your cards using a different property.
- : A menu that you'll only see for timelines. If you have more than one date property in your database, use this menu to choose which set of dates you want to use to plot your projects.
- Calendar menus: At the top of calendars, you'll see a menu if you have multiple date properties in your database. This lets you toggle between calendars for each of those properties.
- You may also see at the top of your calendar — it's a menu that contains the items that don't have the property filled in.
Database descriptions
Every full-page database gives you the option to add descriptive text underneath its title. Use this space to provide extra context, instructions, or whatever you want.
- To add a description, hover over your database title and click . You'll see a cursor pop up in the space provided.
- If you have content in your description, you can still hide it. Just hover over your title again and click . You'll see a circled pop up to the right of your title.
- To show a hidden description, either click on the circled or (which appears above your title on hover).

Tip: You can add an emoji in-line in Notion using the shortcut followed by the name of the emoji — like for 🍎. You'll see a menu pop up with your options.
Database templates
Let's say you want to add the same type of page to your database repeatedly — like a bug report, or product spec, or gratitude journal. Database templates let you define a page structure and properties you can replicate with one click.
- Create and edit templates by clicking the down arrow on the blue button at the top right of any database.
- To use a template, either select it from the button's dropdown, or choose it from the grayscale menu on a new page.
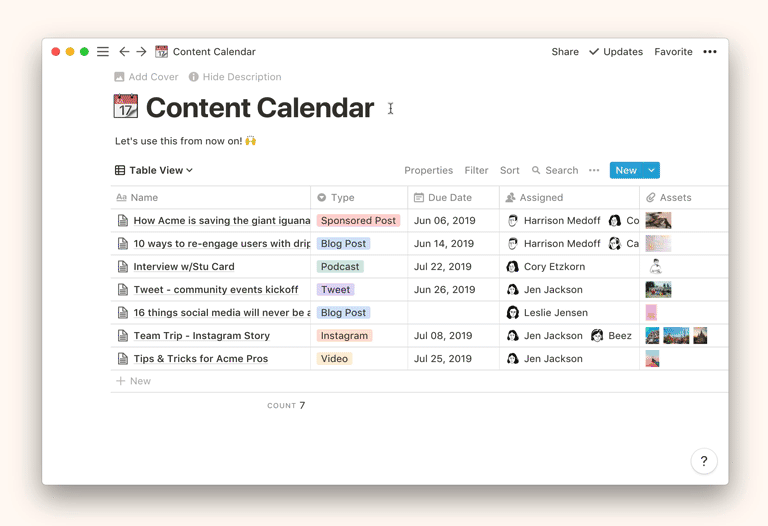
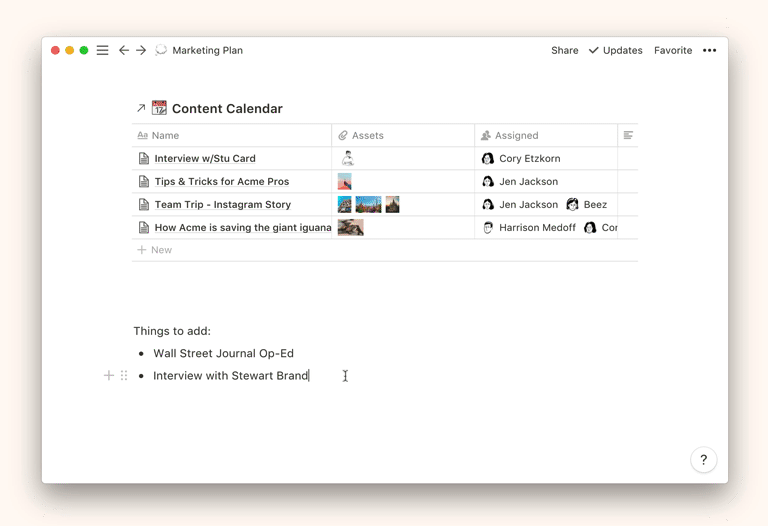
Linked databases
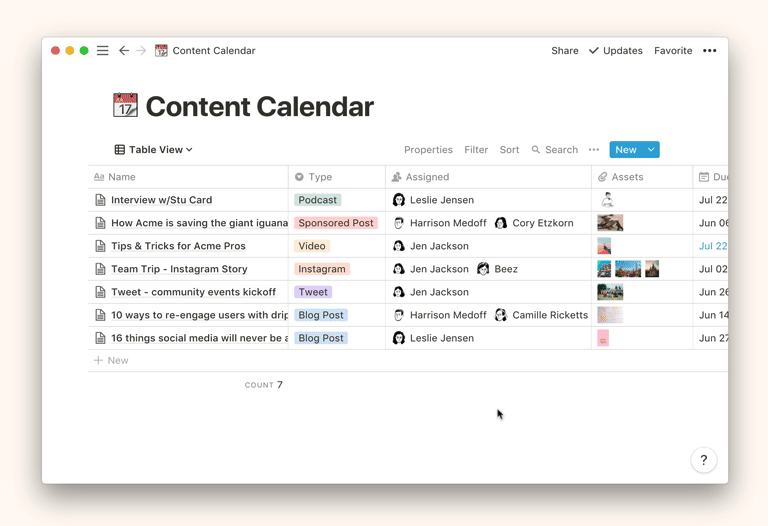
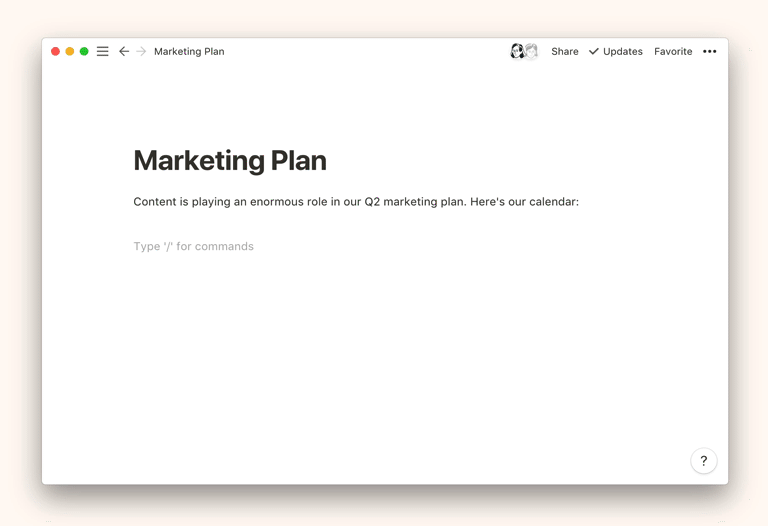
You can create copies or excerpts of a database on another page in your workspace. Let's say you want to reference your content calendar on a page about your marketing plan. is the right block for the job.
- To add a linked database to a page, type and press .
- Type the name of the database you want to copy and press .
- You can change the view of this data (i.e. board, calendar, etc.), filter it or sort it without impacting the data in your original database.
- If you change any property values or content inside a linked database, those changes will be reflected in the original.
- To delete, move, or copy a link to a linked database, click the icon that appears in the left margin on hover. Linked databases work just like in-line databases in this respect.
- Linked databases allow you to put multiple views of the same database on the same page to create a dashboard.
FAQs
How can I prevent people on my team from making changes to my database setup?
Go to the menu at the top right of your Notion page, and switch on . This will prevent other people from changing the way your database properties, views, select and multi-select options are set up. They'll still be able to add data, though! Helpful for maintaining the structural integrity of a database many people use. Anyone with full access to the database can switch the lock off.
How do databases work differently on mobile?
We wrote an entire guide for this here. Key differences include no hover states, limited drag and drop, and the location of menus.
How can I add tags to my work in Notion?
You can use a database to tag pages in Notion, making them easier to find later.
- Store the pages you want to tag in a database (table or list view works great).
- Add the property to your database. Create named tags there.
- Whenever you want to add a new tag, just type it in the property and press .
- To show only the pages with a certain tag, filter your database so that tags must contain a certain value.
- You can also use the property, but this only lets you choose one tag per page. This is helpful for progress tags like , , and , or priority tags like , , .
Tip: Find all our commonly-asked database questions here →
Related guides
Something we didn't cover?
Message us in the app by clicking at the bottom right on desktop (or in your sidebar on mobile). Or email us at team@makenotion.com ✌️